Create Your Client Account
What This Guide Does — Walks you through the eight-step signup wizard used to create a new NOMMOS client account, from starting onboarding through previewing your agent's first AI-generated messages.
Why It Is Useful — Completing this wizard sets up your brand's voice, audience, and visual identity in one place, so every agent NOMMOS runs on your behalf — from social posts to customer replies — sounds and looks like your business from day one.
Before You Start — Have your brand's hex color codes ready, since Step 6 asks for them.
How to Use It
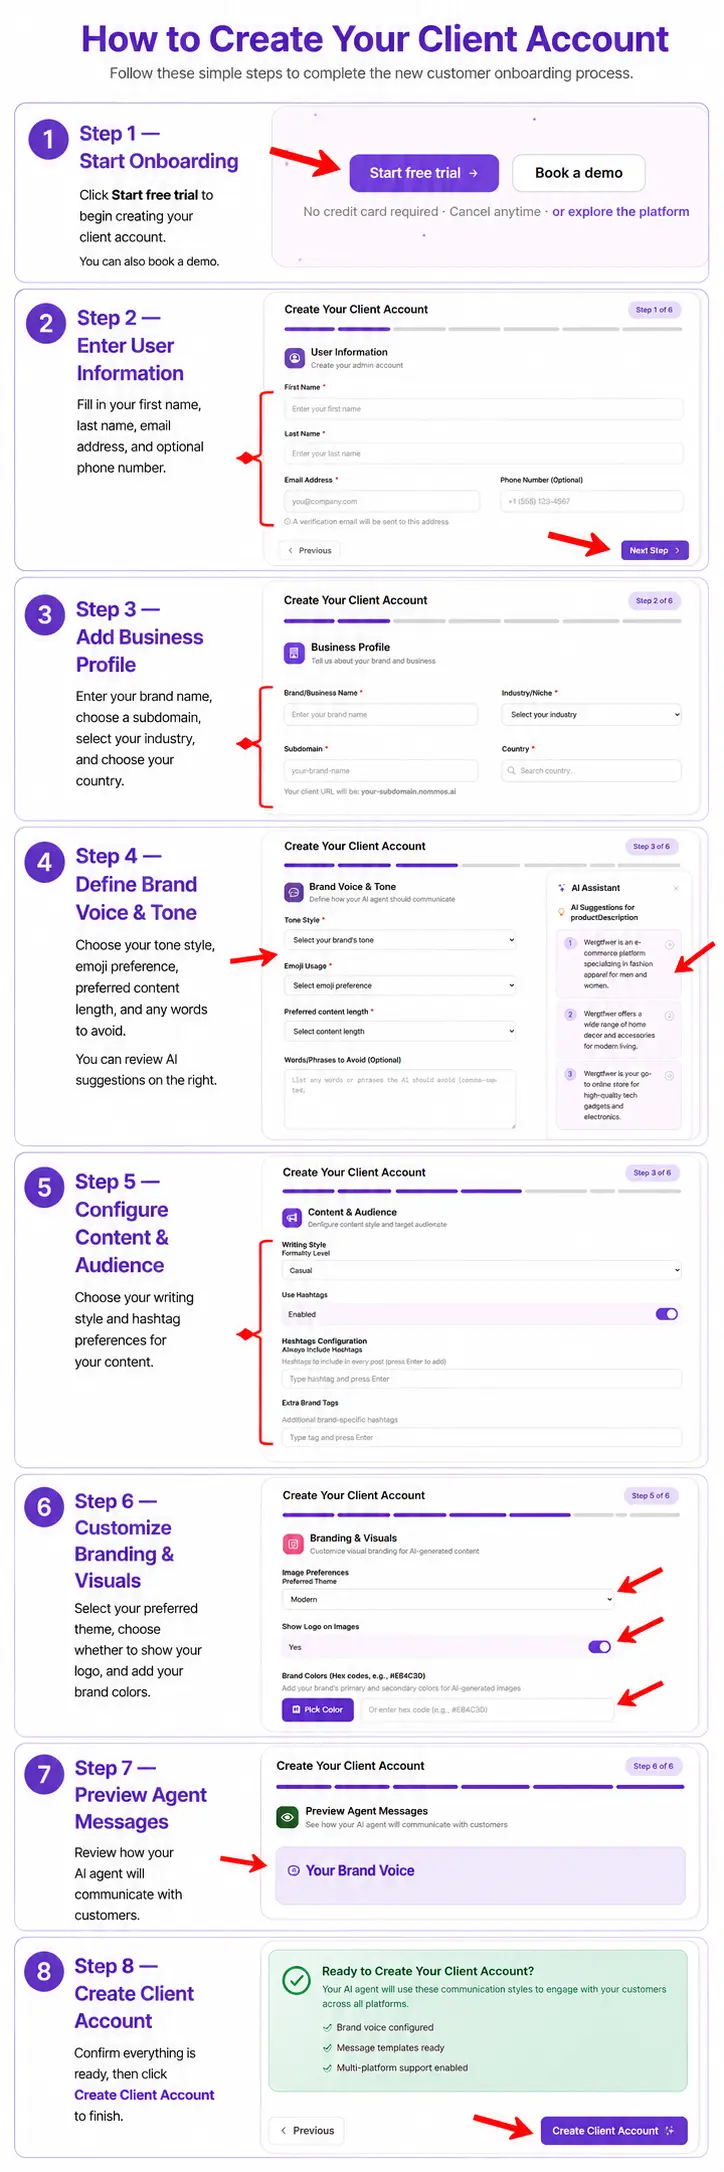
Start Onboarding
Select Start Free Trial to begin creating your client account.
Enter User Information
Enter your first name, last name, email address, and optional phone number.
Add Business Profile
Enter your brand name, industry, subdomain, and country. Your subdomain becomes your client URL.
Define Brand Voice & Tone
Choose your tone style, emoji usage, and preferred content length, and add any words to avoid. Review AI-suggested descriptions on the right.
Configure Content & Audience
Set your writing style, hashtag preferences, and any extra brand tags.
Customize Branding & Visuals
Choose your preferred image theme, decide whether to show your logo on images, and set your brand colors.
Preview Agent Messages
Review how your AI agent will communicate with customers based on your brand voice.
Create Client Account
Confirm your brand voice, message templates, and multi-platform support are ready, then select Create Client Account.
What You Should See — After you select Create Client Account, NOMMOS creates your account and takes you to your new Overview Dashboard, ready for you to log in and enable your first agent.
Tips
- Choose your subdomain carefully — it becomes your team's client URL and is not easy to change later.
- The tone and avoided words you set in Step 4 guide every agent's output going forward, so it's worth being specific. Use the AI-suggested descriptions as a starting point if you're not sure what to write.
Related Guides