Enabling Your First Agent
What This Guide Does — Shows you where to find your agents in the sidebar and walks through enabling and opening one agent as an example.
Why It Is Useful — Agents don't do anything until they're turned on. Enabling your first agent gets NOMMOS actively working for your business, posting, tracking, or engaging on your behalf, right after setup.
Before You Start — Complete the account creation wizard first, since agents use the brand voice, audience, and visual settings you defined there.
How to Use It
Open Settings
Click Settings in the main sidebar.
Select the Agents Tab
Open the Agents tab under Settings.
Open Agent Management
Click Agent Management (Roster) to view all available agents.
Enable Your Chosen Agent
Switch on the toggle. The green Active status confirms the agent is enabled.
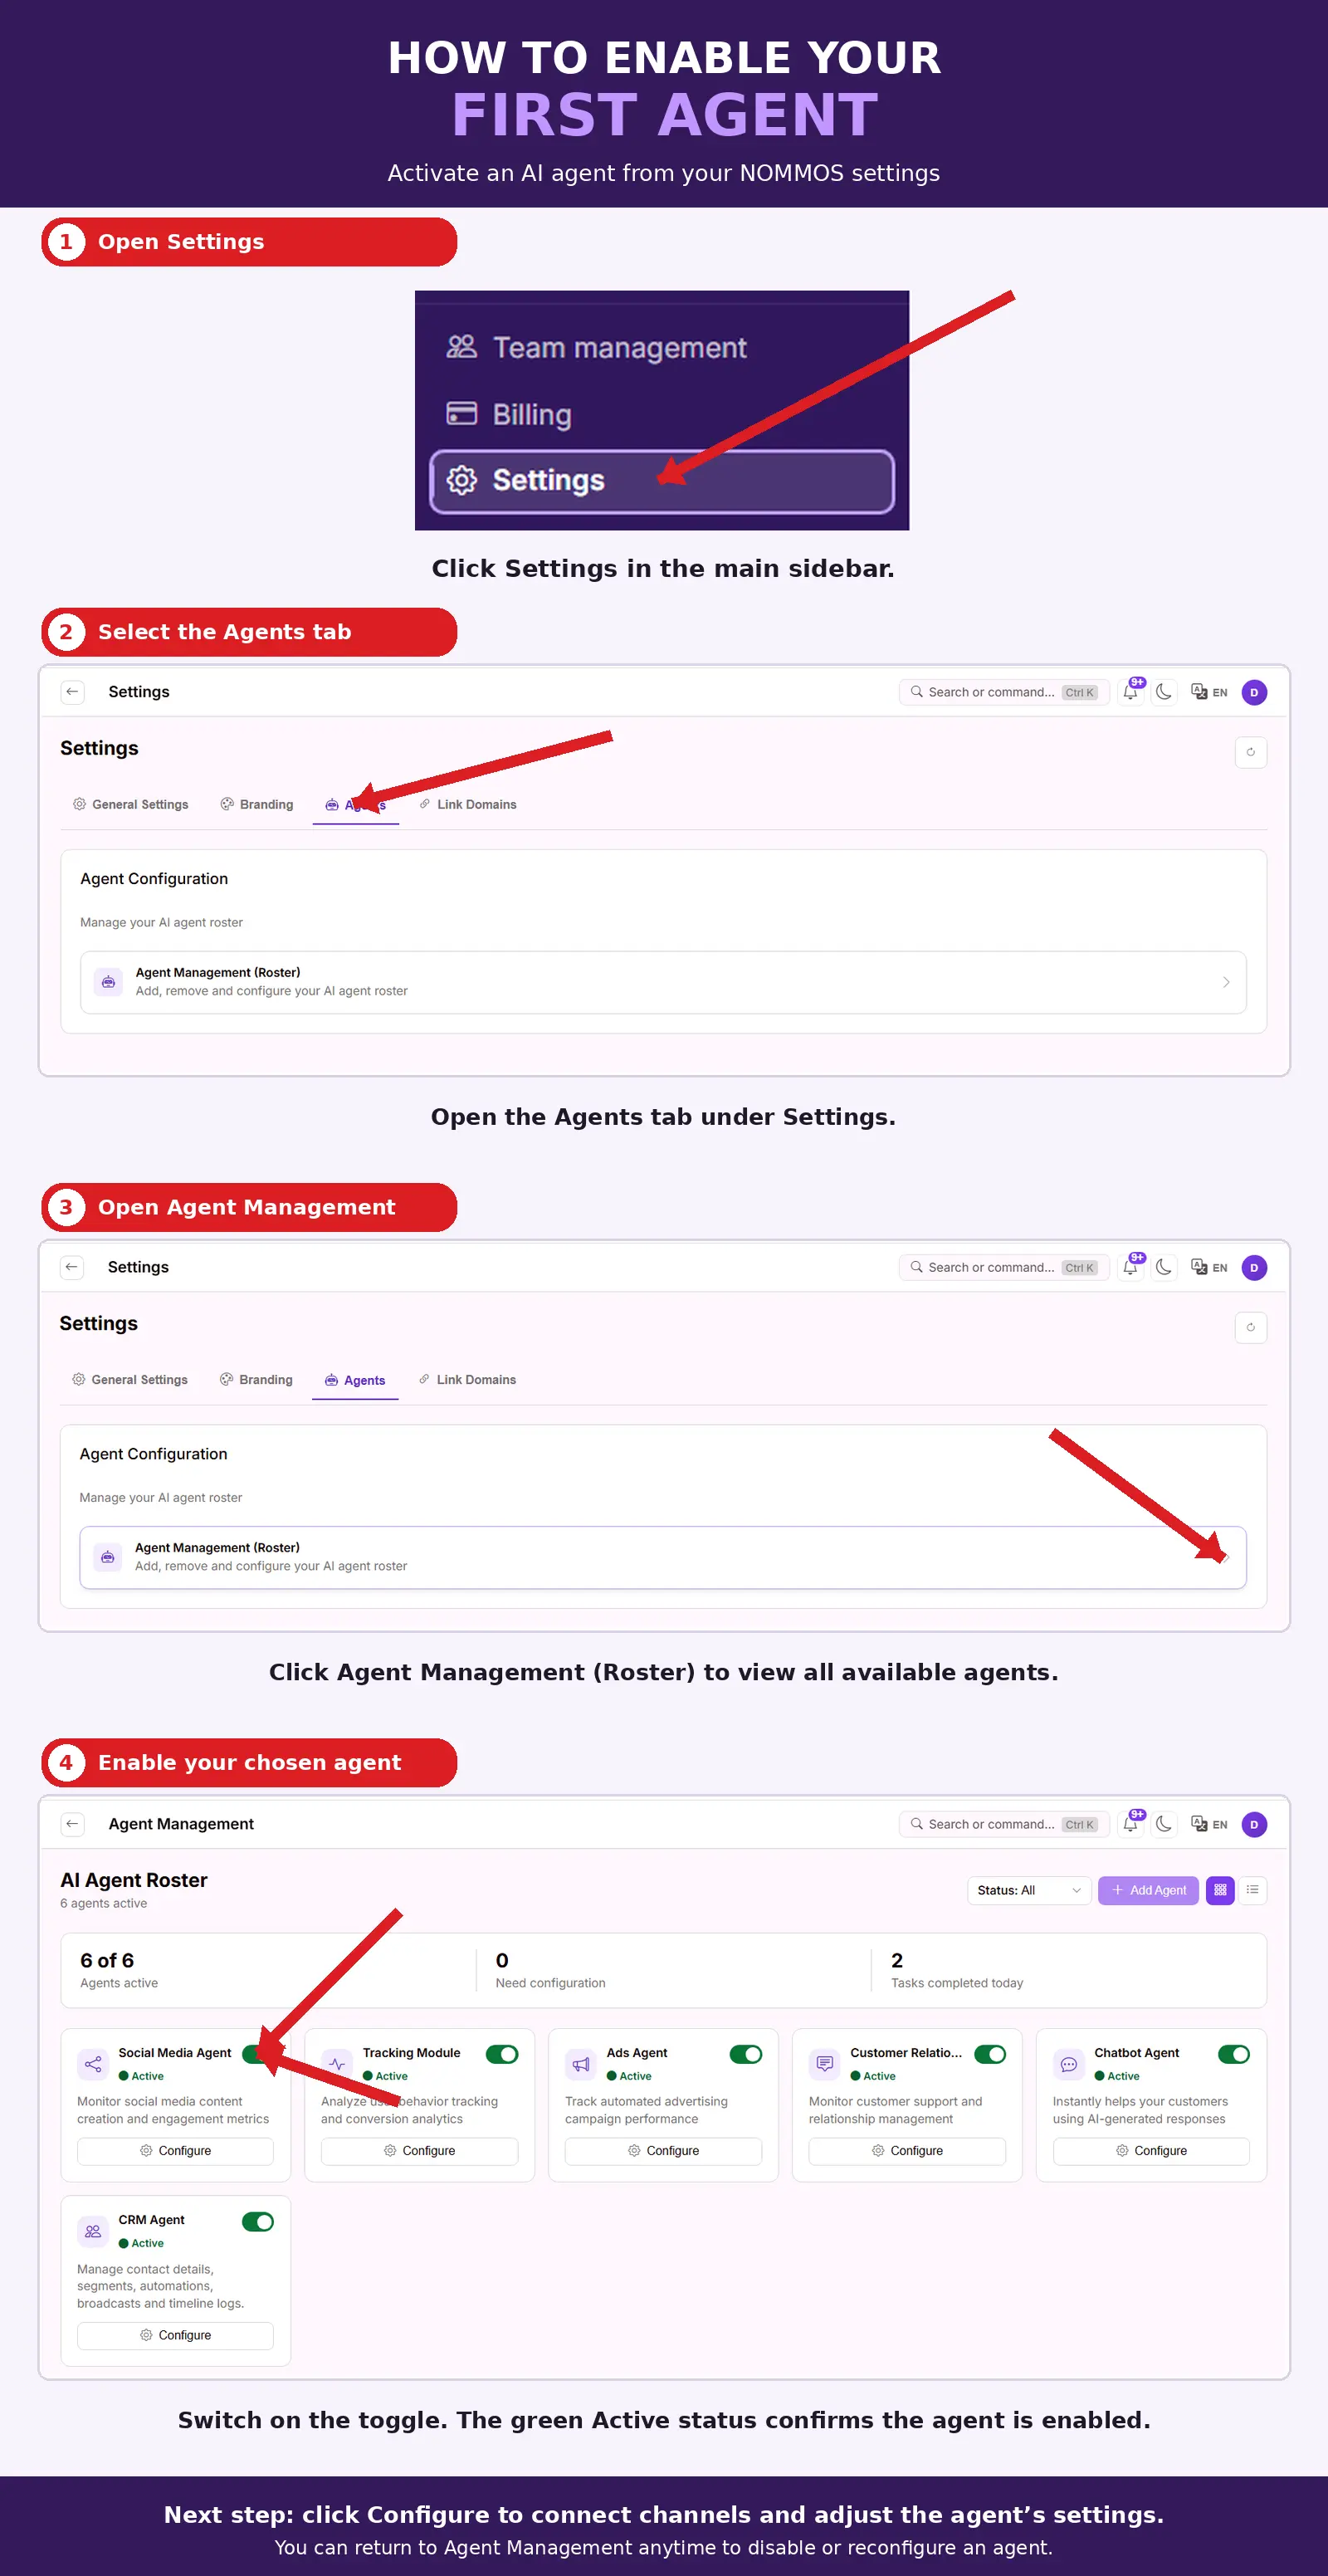
What You Should See — The agent's toggle switches to an "Active" state in the AI Agent Roster, and the agent begins working according to its configured settings, with its activity soon reflected in your Overview Dashboard and reports.
Tips
- Enable one agent at a time so you can review its results before turning on more.
- Click Configure on an agent's card to connect channels and adjust its settings — you can return to Agent Management anytime to disable or reconfigure an agent.
Related Guides