Content Calendar
What This Guide Does — Shows how to view and schedule content on the Content Calendar.
Why It Is Useful — Gives you one place to see everything scheduled or published across your platforms, instead of tracking posts separately.
How to Use It
Open Content Calendar
From the left menu, click Content Calendar.
View the Calendar
Use the month selector to change the view, or click Schedule Content to add a new post.
Review Scheduled Content
The calendar displays your scheduled posts for each day.
Start Scheduling
Choose what you want to schedule.
Pick Content
Search and select the content you want to schedule, then click Next.
Confirm Your Selection
Your selected content is highlighted. Click Next to continue.
Choose Date & Time
Set the date and time for your post, then click Schedule.
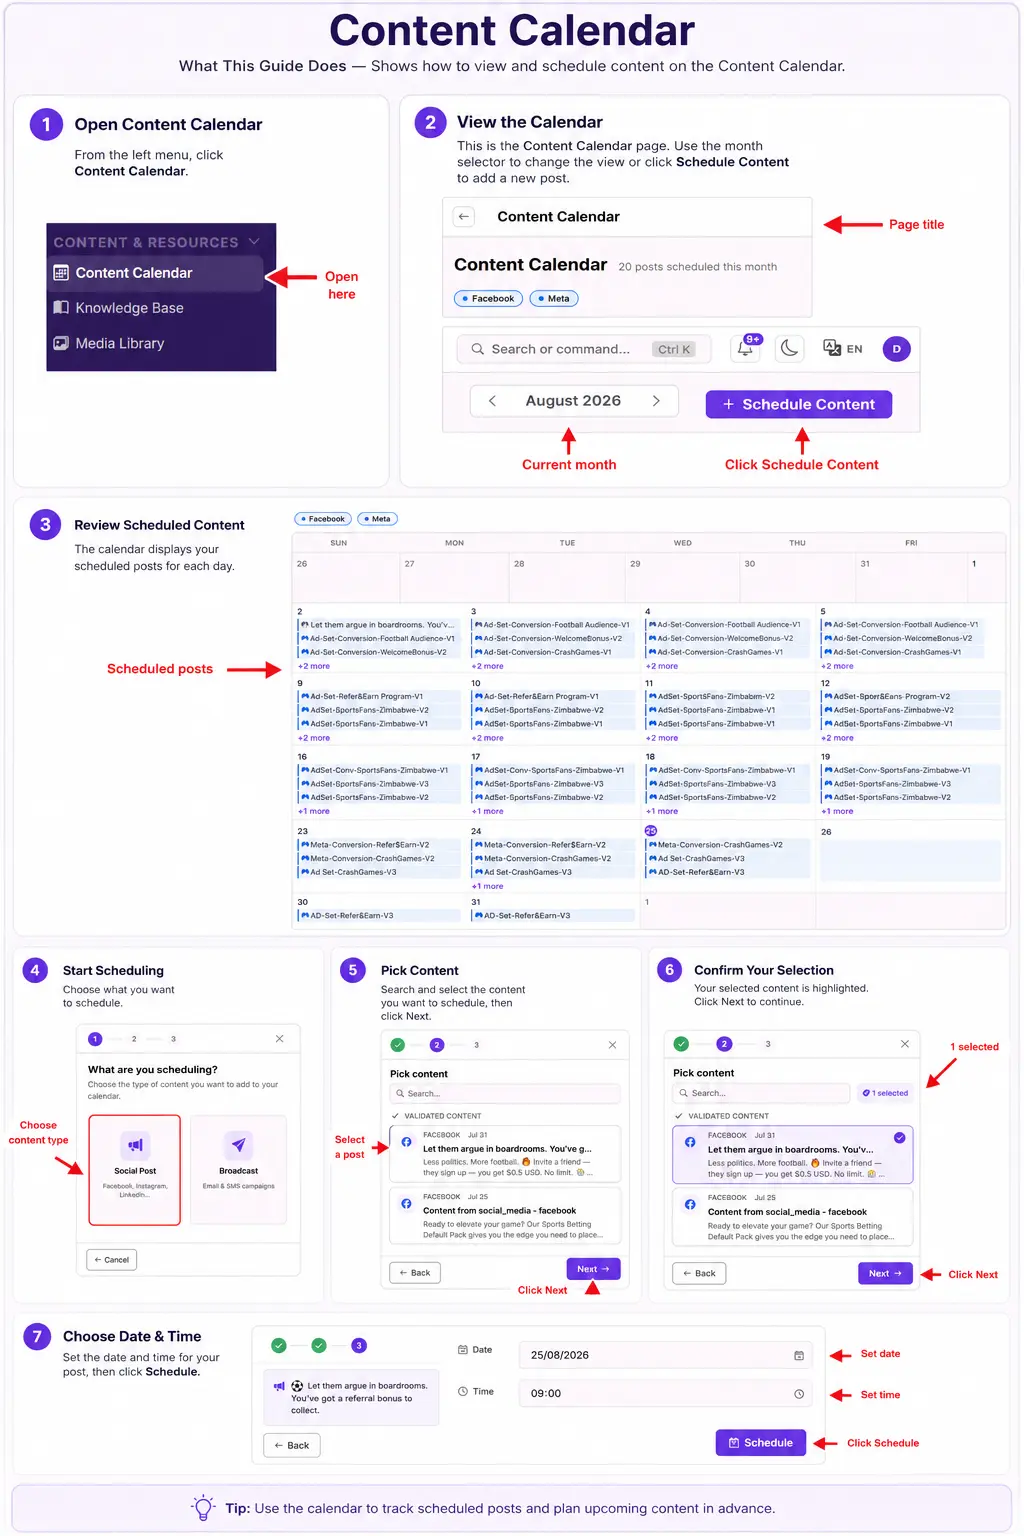
What You Should See — Your scheduled item appears on the chosen date, and moves to "published" once it goes live.
Tips
- Use the calendar to track scheduled posts and plan upcoming content in advance.
Related Guides