Auto-Reply Assistant
What This Guide Does — Explains the Auto-Reply Assistant's Overview screen and how it automatically replies to customer comments and messages across your connected platforms.
Why It Is Useful — It saves you from manually replying to routine comments and messages, while keeping every reply on-brand.
How to Use It
Open the Auto-Reply Assistant
Under Engagements Agents, click Customer Interaction Agent.
Choose the Reporting Period
Choose Today, Last 7 Days, Last 30 Days, Last 90 Days, or a custom date range; use Configuration to manage channels.
Read the Engagement Summary
Track AI auto-responses, engagement rate, and the number of customers engaged during the selected period.
Review Auto-Responses Over Time
Use the weekly trend to see when the agent responded and spot inactive days or unexpected response-volume changes.
Enable and Connect Messaging Channels
Keep the agent enabled, connect a Facebook Page or Instagram business account, and update Meta assets when access changes. Messenger activates with a connected Facebook Page.
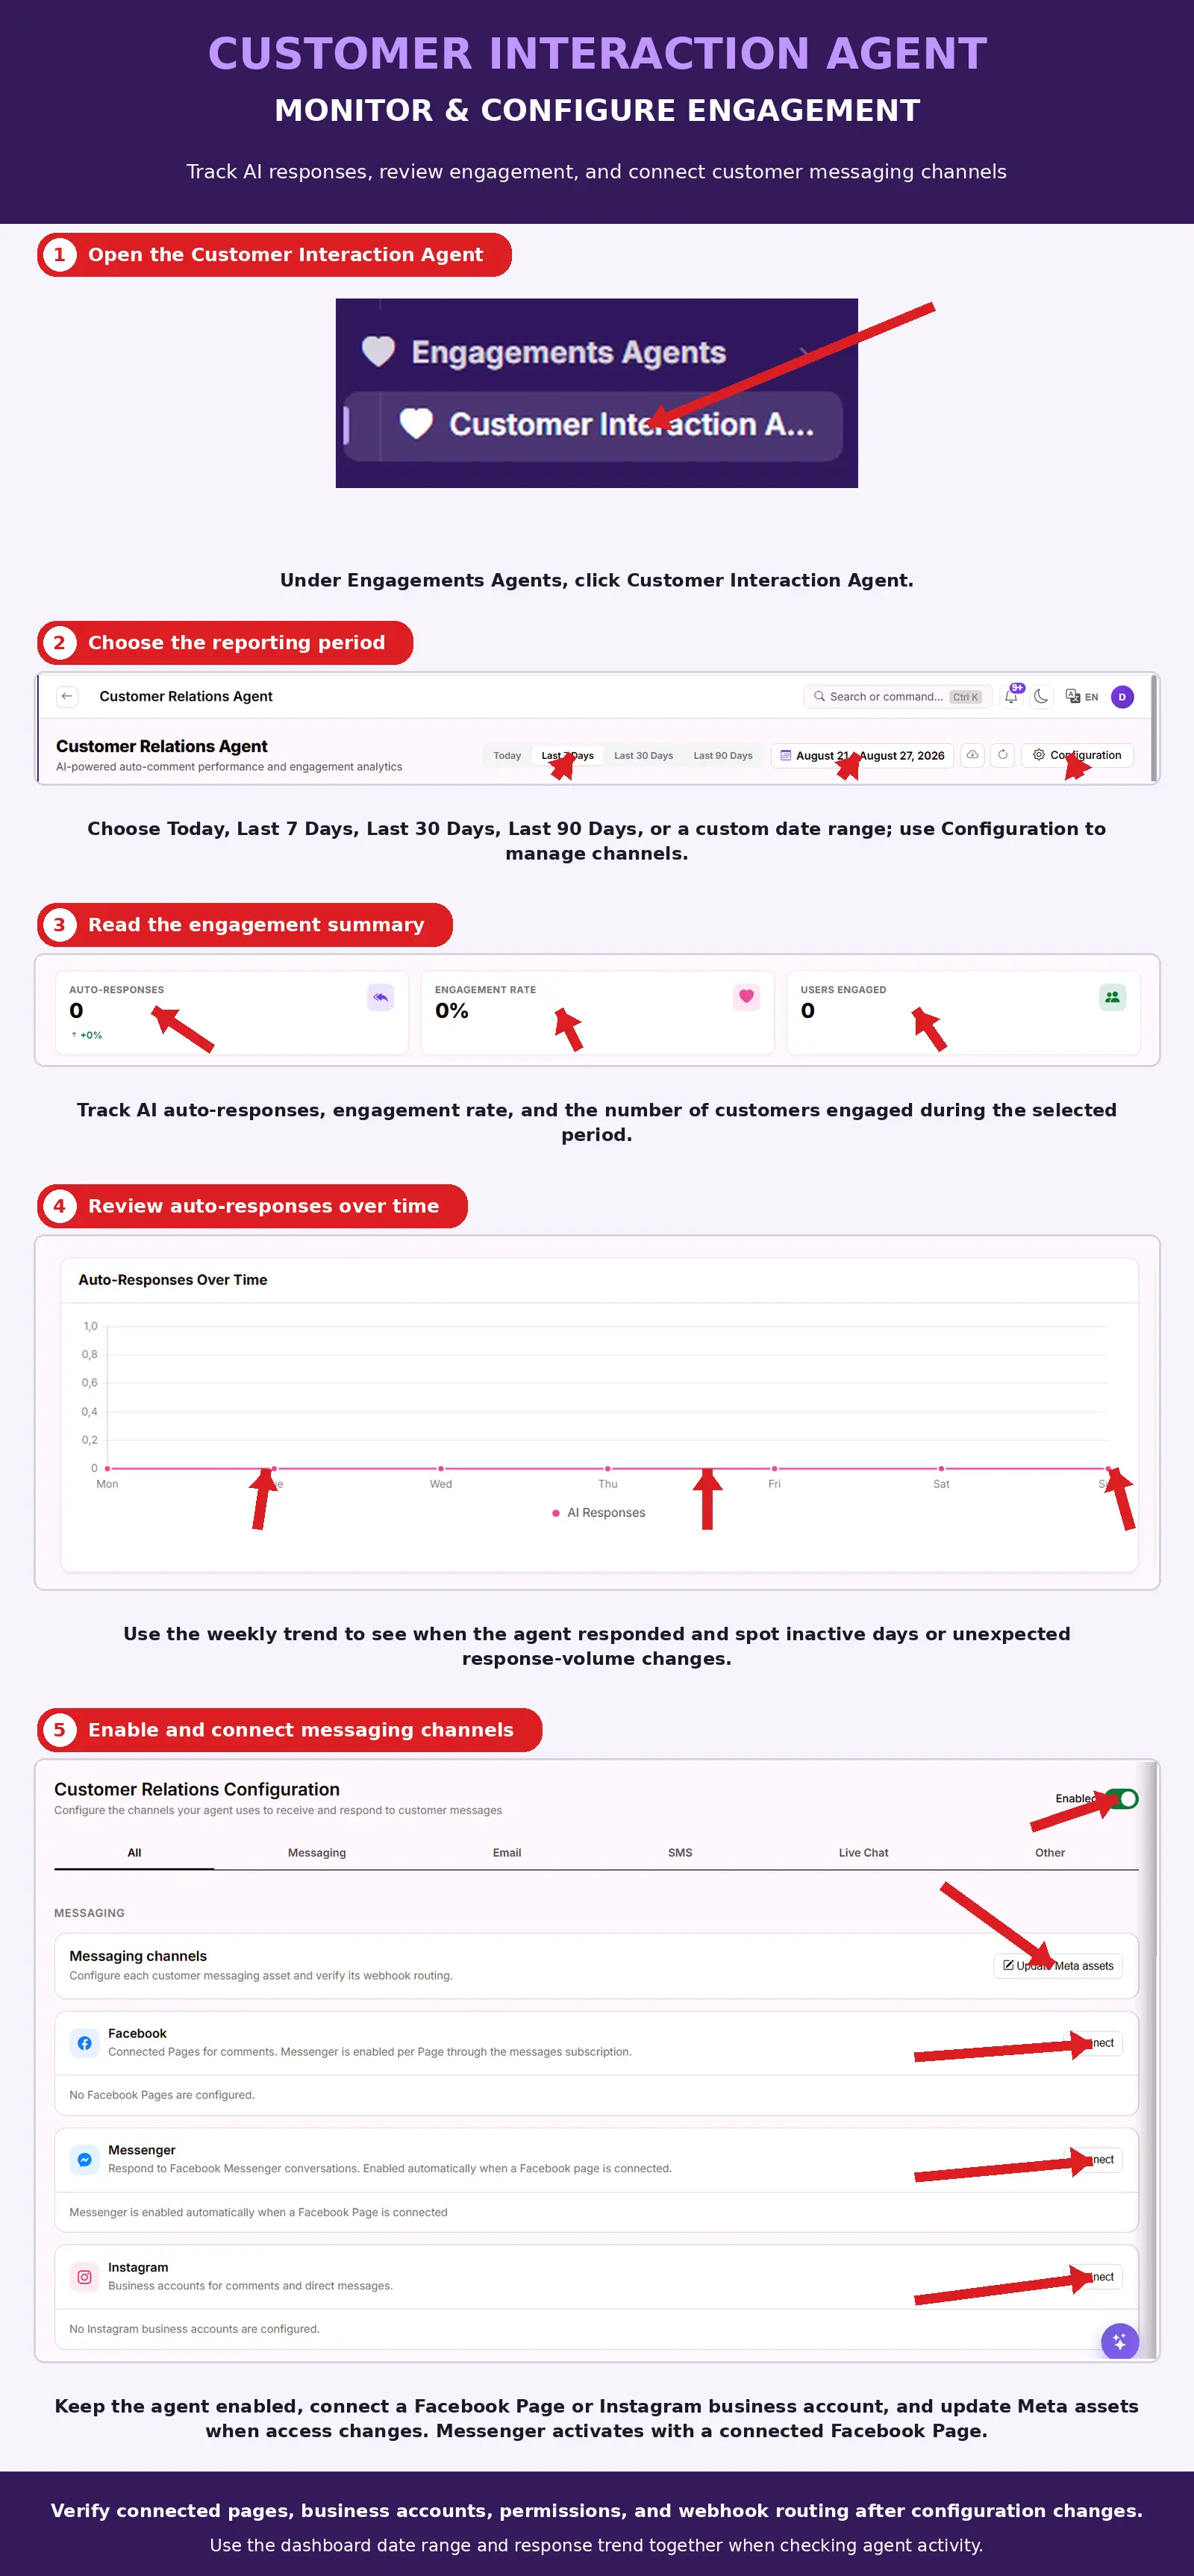
What You Should See — The Auto-Responses, Engagement Rate, and Users Engaged metrics updating for the selected period, and each connected channel showing as configured under Messaging Channels.
Tips
- Verify connected pages, business accounts, permissions, and webhook routing after configuration changes.
- Use the dashboard date range and response trend together when checking agent activity.
Related Guides
How the Agent Decides What to Reply
The AI reviews each incoming comment or message and generates a contextually relevant reply based on your brand voice settings. It reads what was said and matches the tone, and any words or topics to avoid, that you defined during account setup.