Media Library
What This Guide Does — Shows how to upload and browse image, video, and document assets in the Media Library.
Why It Is Useful — Keeps all your brand assets in one place so agents and your team can reuse them without hunting through separate folders.
How to Use It
Open the Media Library
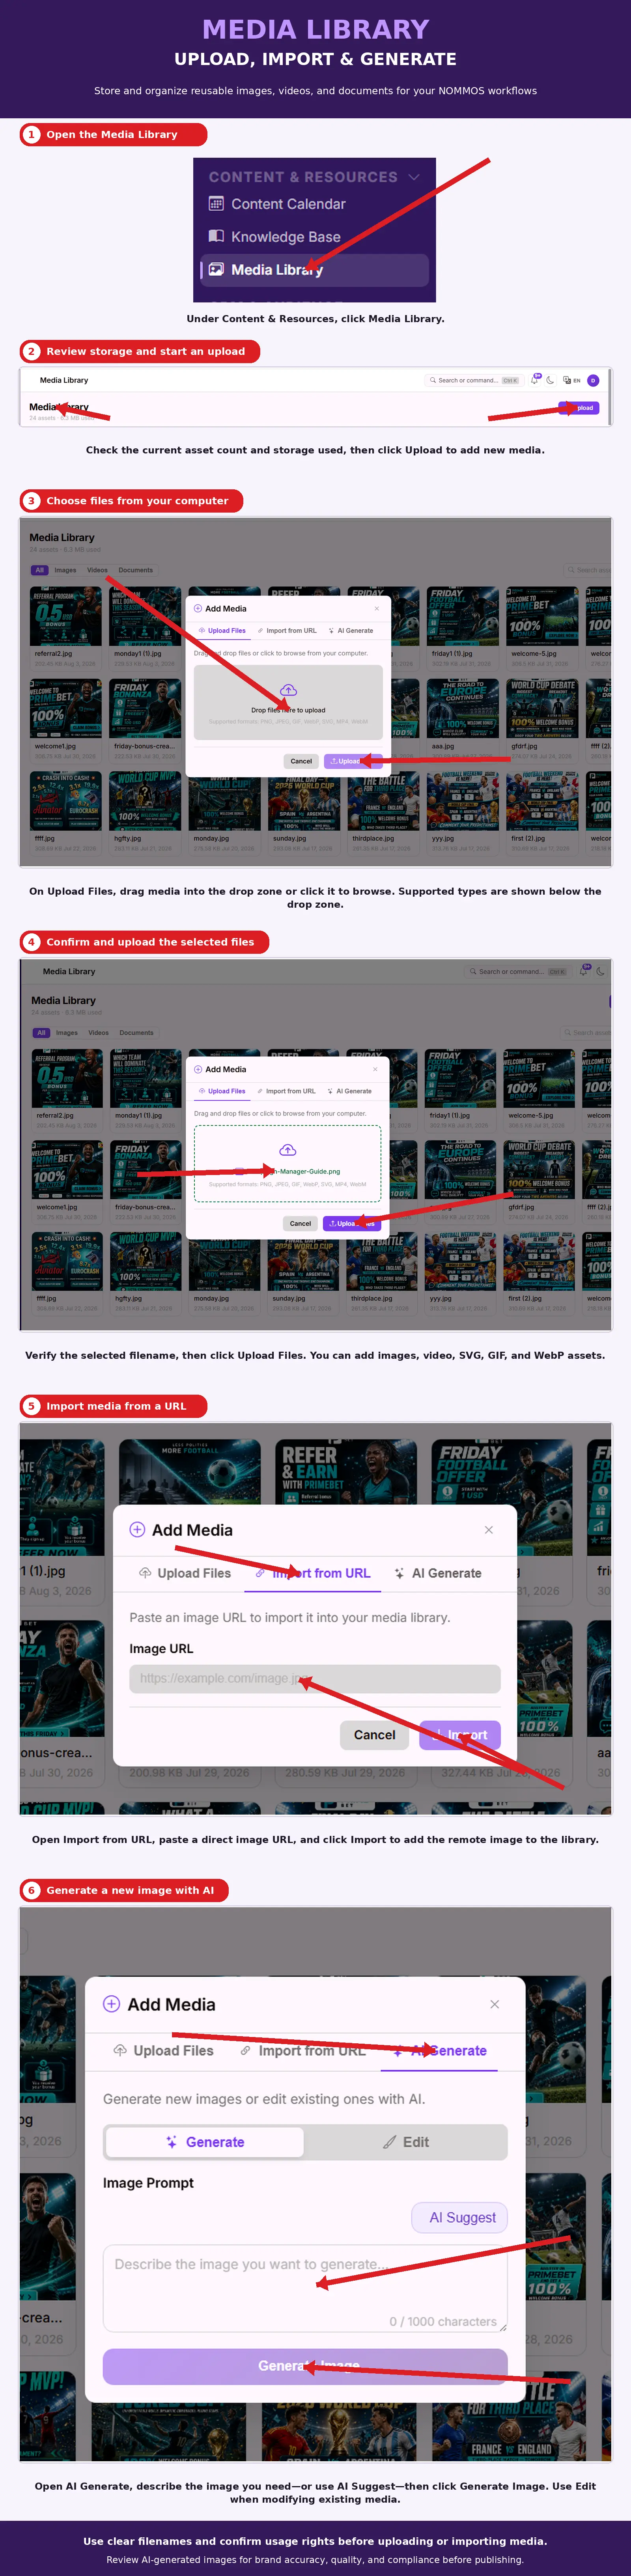
Under Content & Resources, click Media Library.
Review Storage and Start an Upload
Check the current asset count and storage used, then click Upload to add new media.
Choose Files from Your Computer
On Upload Files, drag media into the drop zone or click it to browse. Supported types are shown below the drop zone.
Confirm and Upload the Selected Files
Verify the selected filename, then click Upload Files. You can add images, video, SVG, GIF, and WebP assets.
Import Media from a URL
Open Import from URL, paste a direct image URL, and click Import to add the remote image to the library.
Generate a New Image with AI
Open AI Generate, describe the image you need — or use AI Suggest — then click Generate Image. Use Edit when modifying existing media.
What You Should See — Your uploaded, imported, or AI-generated asset appears in the library, with the asset count and storage used updated to match.
Tips
- Use clear filenames and confirm usage rights before uploading or importing media.
- Review AI-generated images for brand accuracy, quality, and compliance before publishing.
Related Guides