Customer Journeys
What This Guide Does — Shows how to build a multi-step automated journey in the Journey Builder.
Why It Is Useful — Lets you guide a contact through a sequence of messages over time, instead of manually sending each step yourself.
How to Use It
Open Journeys
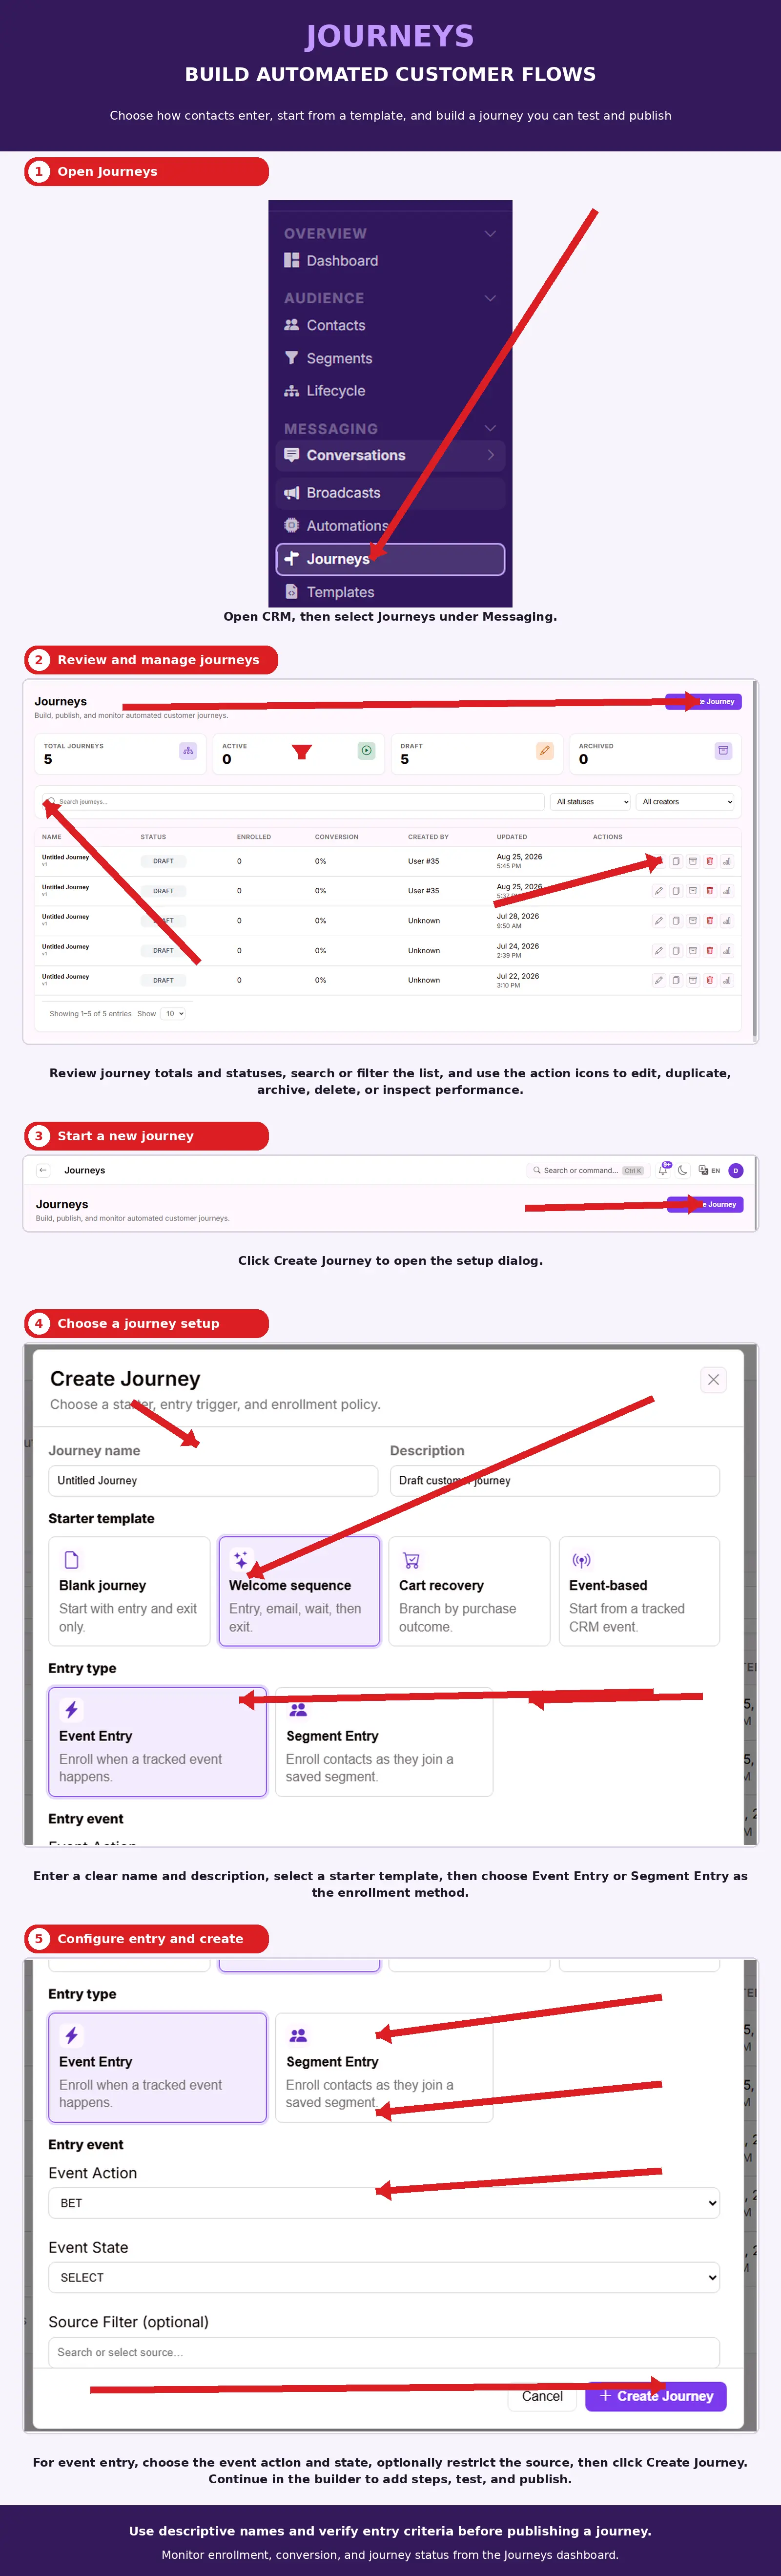
Open CRM, then select Journeys under Messaging.
Review and Manage Journeys
Review journey totals and statuses, search or filter the list, and use the action icons to edit, duplicate, archive, delete, or inspect performance.
Start a New Journey
Click Create Journey to open the setup dialog.
Choose a Journey Setup
Enter a clear name and description, select a starter template, then choose Event Entry or Segment Entry as the enrollment method.
Configure Entry and Create
For event entry, choose the event action and state, optionally restrict the source, then click Create Journey. Continue in the builder to add steps, test, and publish.
What You Should See — The new journey appears in the Journeys list as Draft, ready to open in the builder to add steps before you publish it.
Tips
- Use descriptive names and verify entry criteria before publishing a journey.
- Monitor enrollment, conversion, and journey status from the Journeys dashboard.
Related Guides